Image Introduction by Christopher Robinson – Editor of Outdoor Photographer Magazine
“Spanning the width of the Sierra Nevada mountains in California, King’s Canyon National Park features some of the most dramatic scenery in the world. Along with Sequoia National Park, which is immediately south of King’s Canyon NP, a priceless segment of the wilderness is preserved by the National Park Service. While paved roads traverse the combined Sequoia & King’s Canyon area, if you can park and hike up into the higher elevations, you’ll find vistas like this.”

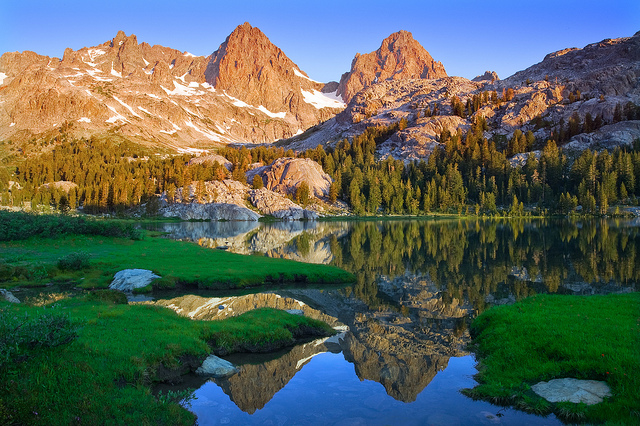
Bullfrog Lake – Kings Canyon National Park
Reaching wilderness vistas such as Bullfrog Lake, may seem intimidating to many outdoor enthusiasts. However, with careful preplanning, accessing these beautiful higher elevation views might not be as hard as you think.
Being prepared and knowing your limitations are just two of the most important elements to consider. Below, I will cover what I feel are the most important tips to assist you in reaching the heart of nature.
1. Know your limitations
First and foremost, it is very important to know what your body is capable of. If you are in reasonably good shape, you can probably prepare yourself quite easily for a longer hike. Keep in mind that many wilderness areas will require that you not only hike the distance lengthwise, but that you are also able to complete the elevation gain. Therefore, ensure that you have first attained all the details of the hike you are planning to take, so you know it is within your personal comfort level.
Hiking into the wilderness usually means that you intend to camp overnight. With this in mind, if your destination is say, 5-miles, you will have enough rest and a chance to refuel before making the return hike.
2. Physical preparation
If you are new to hiking, start by walking in a local park, or an area that you want to photograph that has an easy to moderate trail. Maybe a mile or two round-trip. The important thing is to start out slowly, before steadily increasing the length of your walk or hike. Comfortably walking 5-miles in a day, is a good indication that you are ready for the next step. If you are preparing for an overnight backpacking trip, put some items in your backpack, and carry the pack during your practice walks. Doing this will also help you get used to hiking while carrying the extra weight of your gear.
3. Elevation Acclimation
If the hike you are planning to take requires a substantial elevation gain, first make sure that you spend a good hour or two at a location where the altitude is higher than you are used to. Depending where you live, you may be able to do this by simply driving somewhere that is located at a higher elevation, such as a State Park. Once there, walk around as much as possible, and don’t forget to pack a lunch. Exercise, eating and resting are all important things to experience while acclimating your body to higher elevations.
Many visitors traveling just to experience the great outdoors, make sure they have the extra time needed to get acclimated to the high elevation, before beginning a hike. I have met several people while on the trail, that have told me they are just hiking part of the trail, as a day hike, just so they can get used to the conditions. This is a great idea for hikers who are traveling from an area where the elevation is low, and have not experienced conditions at high elevations.
4. Dress Comfortably
Dress with the option of adding layers. Depending on the season, you may start out wearing just a tee shirt. However, temperatures in high elevation areas can drop dramatically towards the end of the day and into the evening. You will probably add at least one layer by the time you reach your destination.
Your feet will probably feel the brunt of a long hike more than any other part of your body; therefore comfortable footwear is a necessity. If you buy hiking boots specifically for this hike, make sure you test them to make sure they are going to remain comfortable, throughout the journey. I usually test my new hiking boots thoroughly, by going on several long walks, in the days leading up to my trip.
5. Pack Light
While you will want to make sure that you pack everything needed for your trip, it is very important that you pack as light as possible. This will go a long way in maximizing your overall comfort level, during the hike.
Before buying any item for my trip, I always do extensive research to determine each item I eventually choose to buy. This determination is based on three important factors. They are quality, weight and cost.
All of my camping gear, including clothing was bought from REI. They have an excellent website, where you can find a detailed description of each item, as well as many customer reviews for most of the items. REI stores also usually have great customer service, and a very relaxed return and exchange policy. http://www.rei.com
6. Test Your Gear Before You Go
Take enough time to learn how to use your new gear, and to make sure everything works correctly. Whether it be your new mini-stove, headlamp or tent. I cannot emphasize this enough. Can you imagine trying to setup your new tent after a long hike, only to discover that you are not able to figure out how to do this. I always practice putting my tent up at home several times, to avoid what could lead to an uncomfortable and possibly dangerous situation, while out in the wilderness.
A comfortable backpack is also essential for your trip. Another great thing about shopping at REI, is they have very knowledgeable staff. Not only will they recommend the best backpack for you, based on your needs, but you will be able to put the backpack on in the store, and walk around. They will even put items in the pack, as well as help you adjust the fittings to fit your body comfortably.
7. Gear Essentials
Below is a list of gear I include in my backpack, while on an overnight stay in the wilderness. While I believe each item on this list to be essential, this is not an all-inclusive list, nor do I always use each item on every trip I take.
- Tent (Rain and windproof)
- Sleeping Bag (Rated to 20 degrees or lower)
- Thin Floor Mattress (A blow-up mattress is a good option)
- Extra clothing (Think layers and having dry clothes available)
- Liquid (I take both water and Gatorade)
- Water treatment filter (Optional, but a necessity on longer hikes)
- Food (Nutrition bars, dry snacks, soup) All available at REI
- Small camping stove (Cup-a-soup can feel like a 5-star meal in the wilderness, and can really warm you up)
- Small can of burner fuel
- Waterproof matches plus some type of auto lighter
- Small first aid kit
- Aspirin (Headaches are common while at higher elevations)
- Flashlight (Headlamps are exceptional for handsfree operation)
- Spare batteries
- Bear spray
- Toiletries
- Something to bury waste or take-out
- Map and compass (Or GPS unit)
- Bug repellant
- Whistle (For making noise in bear country, or to make people aware of your location)
- Pocketknife (A multi-tool utility knife would be ideal)
- Sunscreen Lotion
Always let someone know where you are going, and when you plan to return home.
By now, you have probably realized the importance of choosing the lightest gear possible. Don’t forget, you will be adding camera gear! I try to plan in advance for the exact type of shots I want to capture, and take just the necessary camera gear needed to achieve my goals.
With enough preparation and careful planning, you will be far less intimidated at the thought of trekking into the great outdoors. The wilderness can be an incredible source of beauty and inspiration, and the rewards for getting into the heart of nature are often simply priceless.
Ediza Lake – Ansel Adams Wilderness
