Tag Archives: long exposure

Landscape Photography During a Storm

Storm Light at Lake Tahoe

Two sayings speak to this shot. First, the one about a picture can’t do a scene justice. Standing there in the driving hail, witnessing multiple lightning bolts was quite the experience, but as hard as I tried I could not capture one bolt. The main part of the storm cleared right at sunset, so I was disappointed by the lack of color in the sky; however I was happy to come away with one shot from this quick but memorable trip.

My decision to shoot at Lake Tahoe was based purely on the storm in the forecast, and the chance of it clearing at sunset. This brings me to the second saying that came to mind. Be careful what you wish for…Yea, right!

Essential Gear

  • Rain jacket with head cover
  • Water proof footwear
  • Water proof cover for photo equipment
  • Keep a set of dry cloths in your car so you can change after the shoot

Landscape Photography Twilight LE Technique

One great benefit of having some interest in the sky during sunrise or sunset is the opportunity to photograph a scene at different times, and be able to come away with more than one acceptable image.

On this particular morning, there was very nice cloud cover above Lake Tahoe. Hoping to make the best of the situation, I set up to photograph not only at sunrise, but also just before and after sunrise. I also used different filter techniques to photograph each moment, so I could capture multiple effects. For this image I used a 10-stop ND filter, to show the effect of streaking pre-sunrise clouds above Emerald Bay. When shooting in the direction of the sun, I like to use a long exposure to obtain this streaking cloud effect just before sunrise and also after sunset, through twilight.

Carefully check the first couple of exposures in the camera’s viewfinder. If you notice blown-out highlights in the sky you will have to adjust the in-camera exposure. Another option is to attach a neutral density grad filter to your Big Stopper filter. This will eliminate blown-out highlights,

Ingredients for Long Exposure Photography

One of my favorite ways to share my work and express my passion, is through Long Exposure photography. With this medium, it is possible to enhance color and fading light in a scene, where to the human eye; both color and light would normally appear to have all but disappeared.

I especially like to use this effect for color photography; however this technique can produce fantastic looking effects to Black and White images. In either format, images can take on a surreal look, especially when the motion of moving water is transformed in to a sheet of silk, or clouds are turned in to streaks of light.

The ingredients (or elements) needed to produce these effects, can vary according to each scene. However, below is a list of ingredients I used to capture the image featured in this blog.

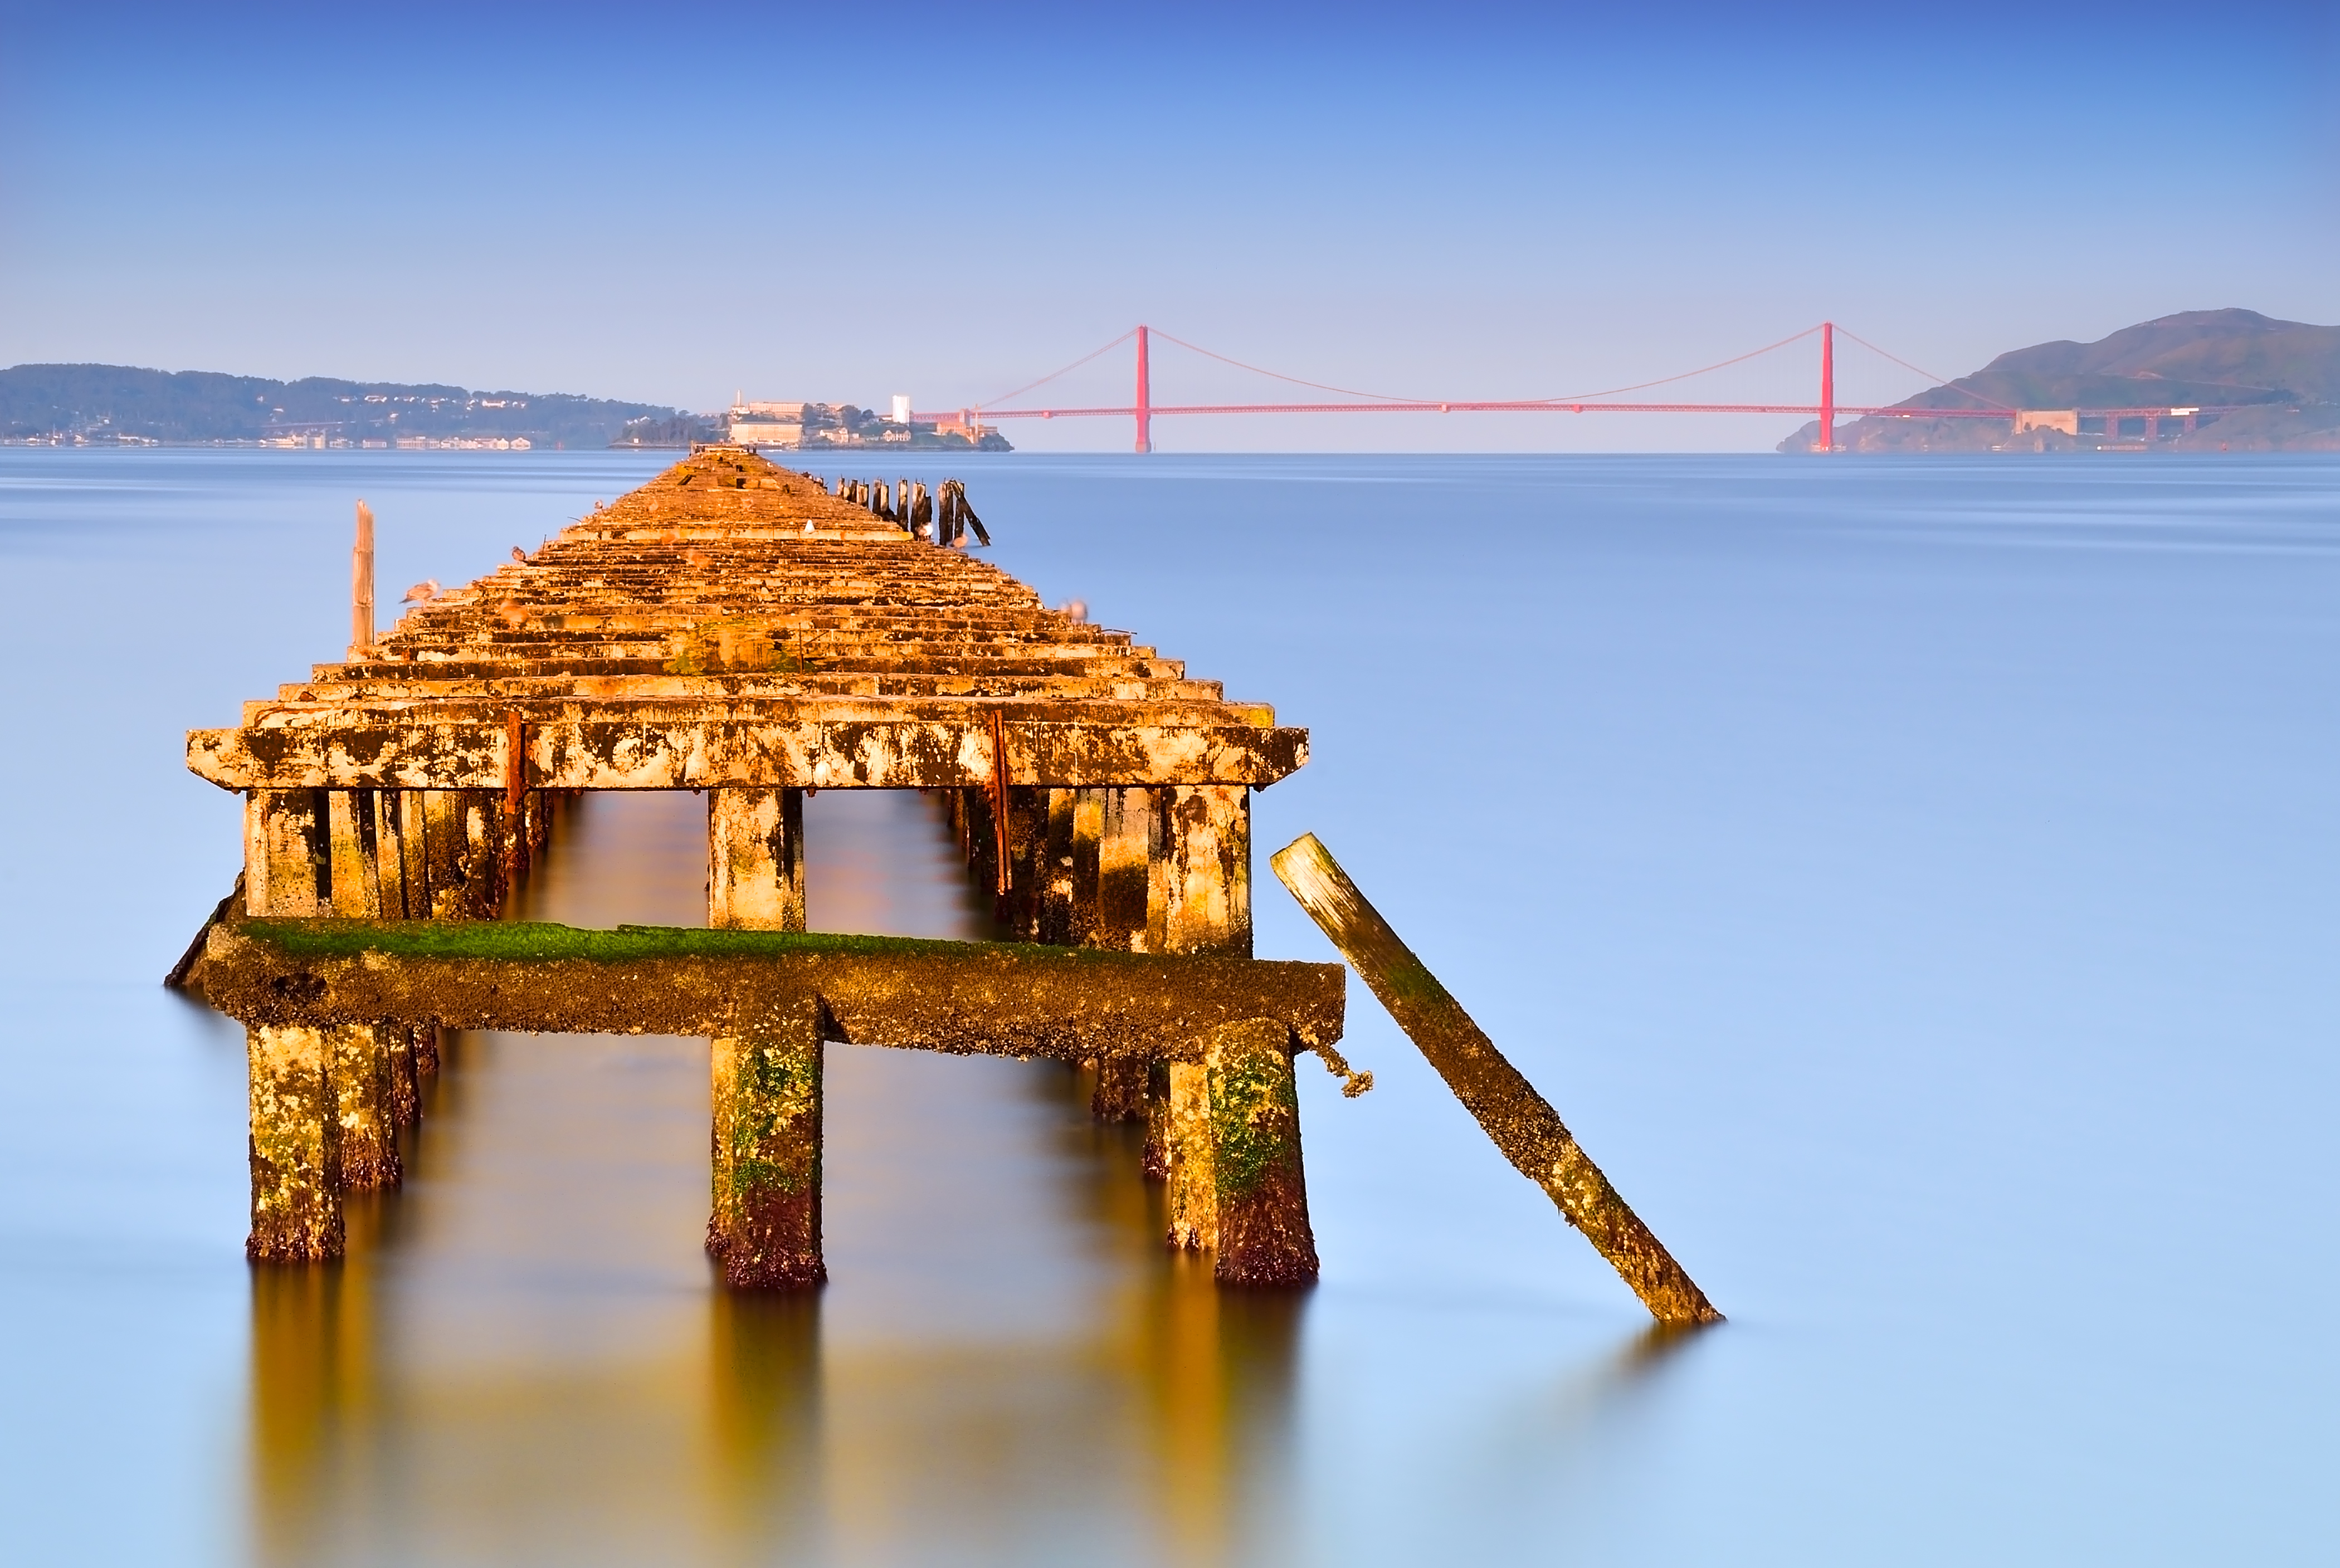
1. Tripod  Really? Dare I mention the obvious? An exposure of 300 seconds was used to take the image accompanying this post, so a steady hand just would not do it.

2. Cable Release  Keeping your hands off your camera during a long exposure is critical, to avoid camera shake that would result in image blur.

3. Pro or Advanced Level Camera  A camera with the ability to be set to record exposures upwards of 30 seconds.

4. Neutral Density Filter  When attached to the front of your lens, or placed into a filter holder, this filter will allow increased exposure times. The strength of this filter is measured in stops. The highest stop value will allow the longest exposure times. There are several companies that make ND filters. The brand I use are circular glass screw on filters, and are made by B+W. I own two 10-Stop filters; to accommodate both 67mm and 77mm lens thread sizes. This filter is often used in combination with a Neutral Density Graduated Filter. A 10-stop ND filter is also great for long exposure photography, during the daytime.

5. Colorful Sky  Even well after sunset, color can be recorded and enhanced with a long exposure.

6. Clouds  If you want to create a streaking clouds effect. A sky with both cloudy and clear patches is ideal to obtain an effective surreal look.

7. Water  Water in motion such as ocean waves, usually yields the greatest effect. The longer the exposure, the smoother the water. Thirty seconds may be enough; however an often used exposure to create the most surreal effect is around 240 seconds.

8. Wristwatch or Stopwatch  To obtain an accurate desired exposure time. An alternative is to buy a cable release that can be electronically programmed to shoot chosen exposure times. These are called intervalometers, or timer remote releases.

9. Patience  Like most things, obtaining the desired result can take patience. Having an understanding of how light works, and how light will effect the scene you are attempting to shoot is very important. Practice is often needed to perfect not only each ingredient of the shoot, but to also strike the right balance between them.

Choose the right scene, exposure, aperture and timing, and you just may find that you will develop quite an appetite for this form of photography.

Image

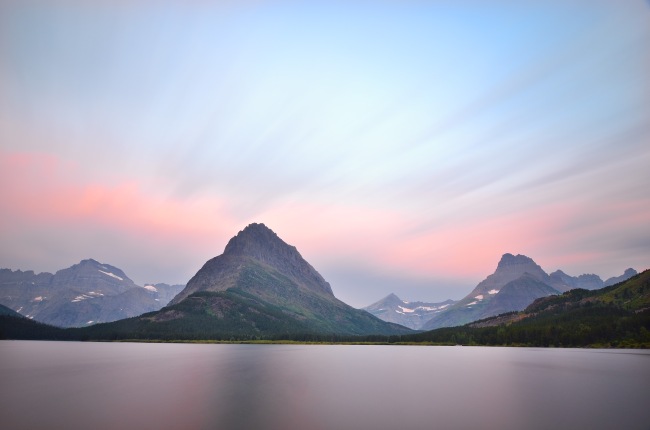
Swiftcurrent Lake, Montana

The above image was taken 30 minutes after sunset. The exposure used was 300 seconds, at f/11.

Reviving Old Images

An image originally marked for the scrap file pile, given a  simple, but effective makeover.

An image originally marked for the scrap file pile, given a simple, but effective makeover.

It’s true; when I originally reviewed this image taken in April 2012, I decided that it would be no more than a simple reference shot, and sent it to my living scrap file folder. The reason I use the term “living” is because my intention is to return to these files someday and attempt to figure out how to improve my overall photographic technique.

In this case, I decided that a simple technique that has become an invaluable part of my workflow, could turn this image around.

The first time I reviewed the image, all I could think of was that the tones were all over the place. It was not until recently that I realized that the only major problem with this image was the awful white balance. After all; my white balance is typically always set to auto, for every shooting condition. In this case the resulting image looked so bad, I failed to give it a second chance.

The Simple Fix

After completing my usual initial workflow in Adobe Camera Raw, I opened the image in Photoshop. I then selected a new layer, by clicking Layer-New Adjustment Layer-Levels, and then clicked OK. In my new Levels Layer, I selected the White Point Eye-Dropper. I then placed the Eye-dropper on the brightest part of the image; in this case, the white square, located at the left edge of the Golden Gate Bridge. I clicked the brightest white area, and just like magic the image was transformed into something I can now consider as much more pleasing to the eye. Just as importantly, I had now restored the image to a more accurate rendition of what I witnesses during that particular Bay Area morning.

The image was captured using an exposure of 173 seconds at f/22. This view is found at the end of the Berkeley Pier, in Berkeley, California.

Mono Lake Symphony

Image

“Being a Landscape Photographer is not just about standing around for hours taking pictures. It’s about standing around for hours waiting for a moment.”

Moments

Two hours earlier: There I was again, wondering if all my planning and scene envisioning was going to come to nothing. On this occasion, I was standing in the pouring rain at Mono Lake, looking up to the sky trying to decide whether to laugh or cry. I just stood there for probably 30 minutes, when all of a sudden my attention was drawn to the western skies. For it was there that I could see that the storm was coming from, and it was from the West that I could now see some patches of blue beginning to form.

As sunset drew closer, I determined which area of the sky would provide the best chance for drama and color, and then set up my tripod and camera so I could capture the unfolding moments.

Even though there were other potentially good views worth shooting, I decided to concentrate on this one scene. I shot different exposures, to capture the scene in various ways while the changing light painted it’s colorful brush strokes. I used a 240 second exposure for this particular image, to extract as much color and drama as possible from the scene.

During this time of inspiration, I thought about all the hours and moments spent while pursuing my passion for being an ambassador of nature. My thoughts led me to the quote I have written directly below this image. As for the long hours spent waiting, I concluded that moments like this make it all worth it.